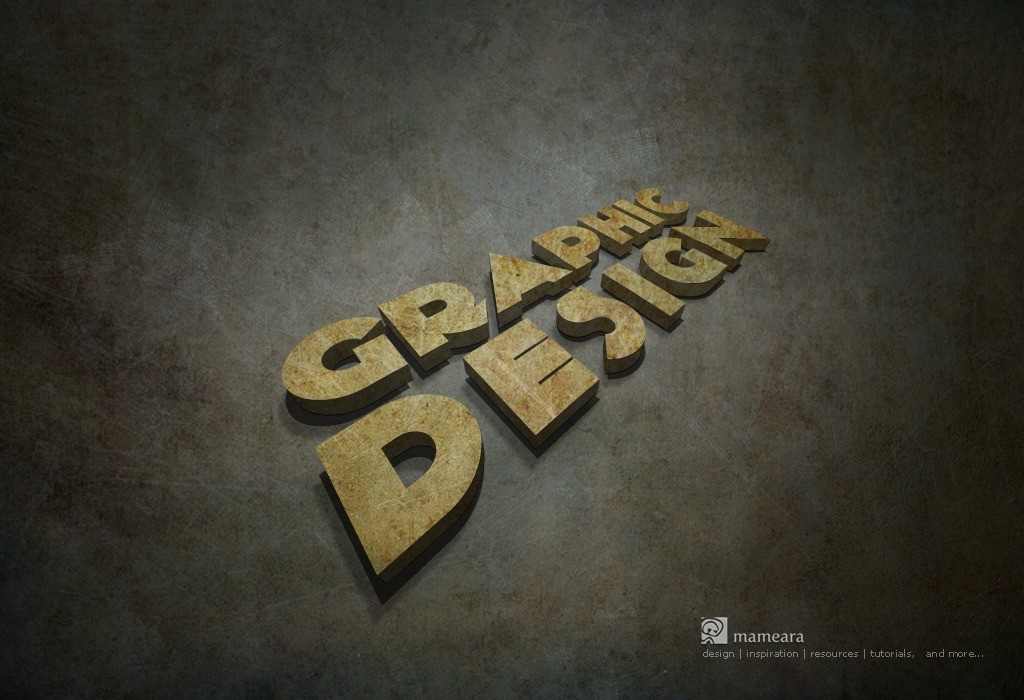
In this tutorial you will learn how to create 3D text in Photoshop and Illustrator, you will find many new tips and tricks in this 3D text tutorial that will help you creating 3d grunge text. I’ve used version CS5 for both photoshop and illustrator but you can create this tutorial with newer or older versions such as CS3 or CS4.
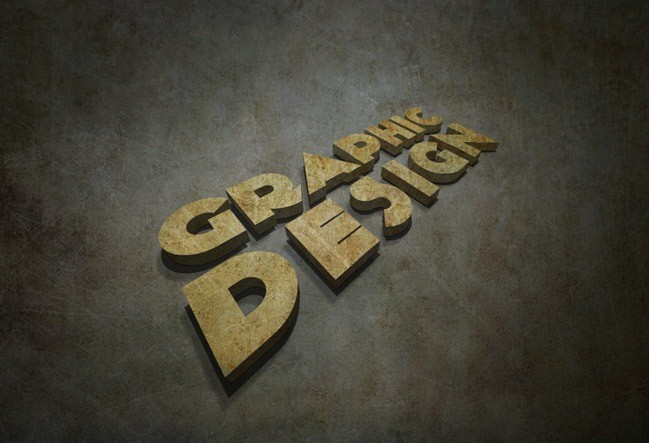
Click here to see the full size
Required Files: Weathered Texture – Dol Guldur texture – kilogram font
Lets Start 3D Text Tutorial with Adobe Illustrator
Step01
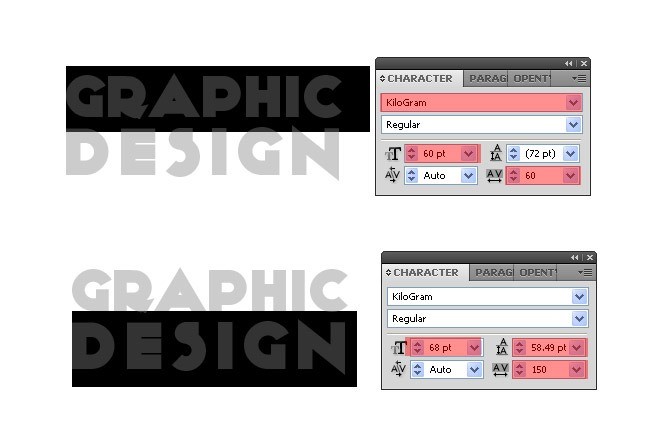
Create a new document in adobe illustrator, use the font kilogram and type “Graphic Design”, and keep every word in a single line, play with the font size and spaces to make it look like a rectangle, or follow the following settings.
Step 02
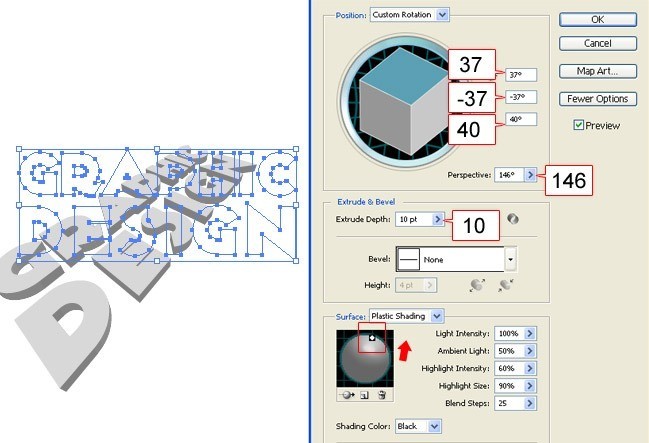
Select the text by the Selection Tool ![]() and press right click on the mouse, from the listed menu select create an outline, keep selecting the text and choose from the menu Filters>>3D>>Extrude & Bevel and set the following settings:
and press right click on the mouse, from the listed menu select create an outline, keep selecting the text and choose from the menu Filters>>3D>>Extrude & Bevel and set the following settings:
Step 03
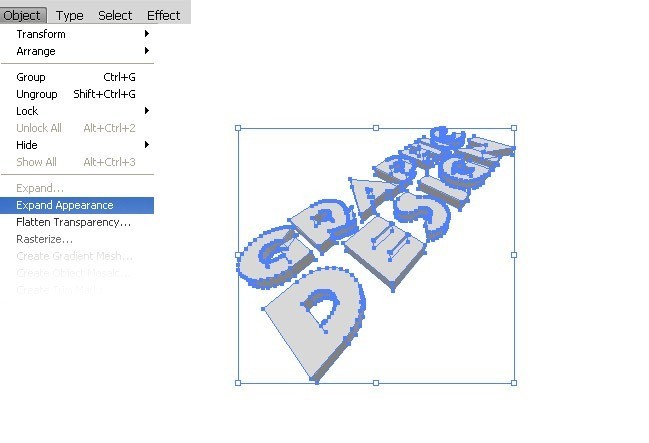
Select the 3D Objects and choose Object >> Expand Appearance from the menu.
Step 04
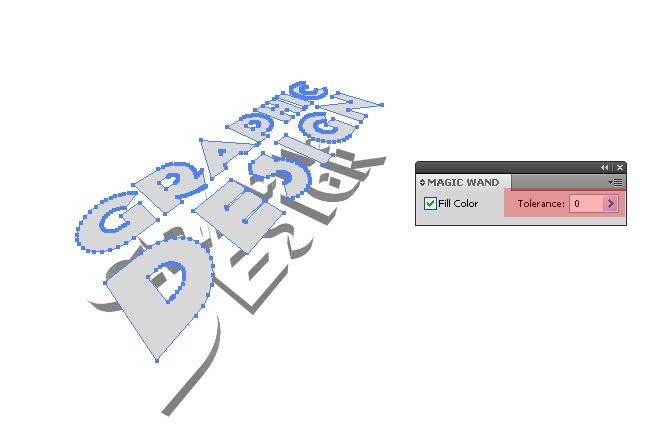
Now Ungroup the 3D objects by hit Ctrl+Shift+G many times on the keyboard to ungroup every part, double click on the Magic Wand Tool ![]() to open the magic wand pallet and set the value of the Tolerance “0” by the magic wand tool select the upper part, and group it Ctrl+G and move it up then select below parts and group them.
to open the magic wand pallet and set the value of the Tolerance “0” by the magic wand tool select the upper part, and group it Ctrl+G and move it up then select below parts and group them.
Step 05 – Photoshop
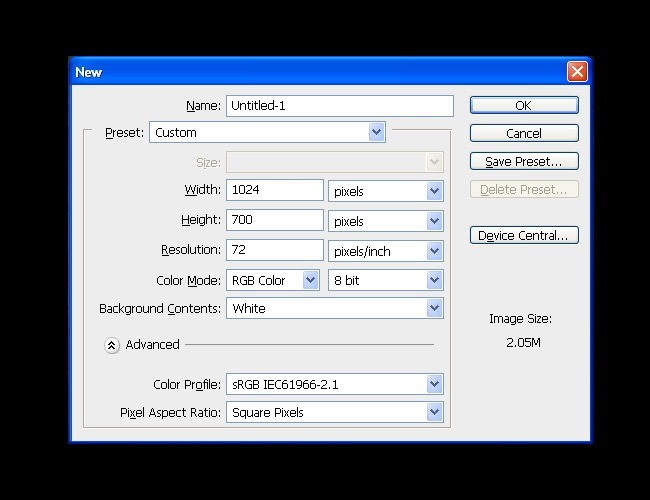
Create a new document with size 1024*700.
Step 06
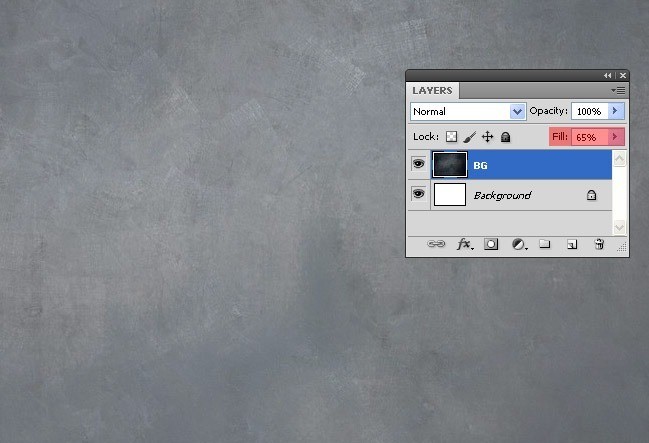
load the texture “Weathered Texture” and re-size it to fit the file size and make the Fill opacity 65%, and? rename the layer to BG.
Step 07
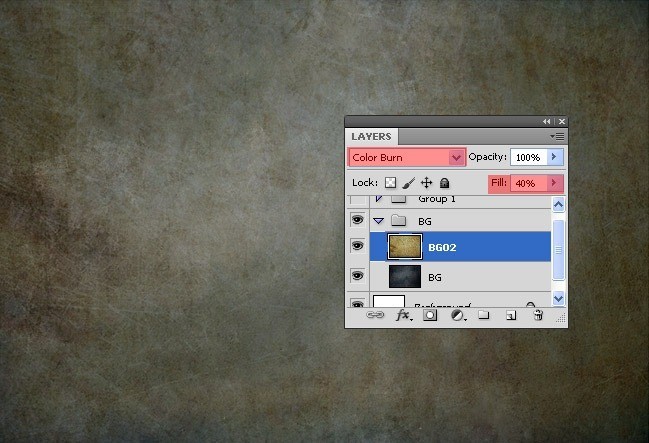
load the texture “Dol Guldur texture ” also re-size to fit all the file size and make the Fill opacity 40% and the blend mode: Color Burn, and rename the layer to BG02
Step 08
Drag the 3d text from Illustrator to Photoshop, and keep in mind drag the upper part by itself and the below part by itself. and place them as Vector Smart Object, now select the two layers and re-size them to any size you like to work on,
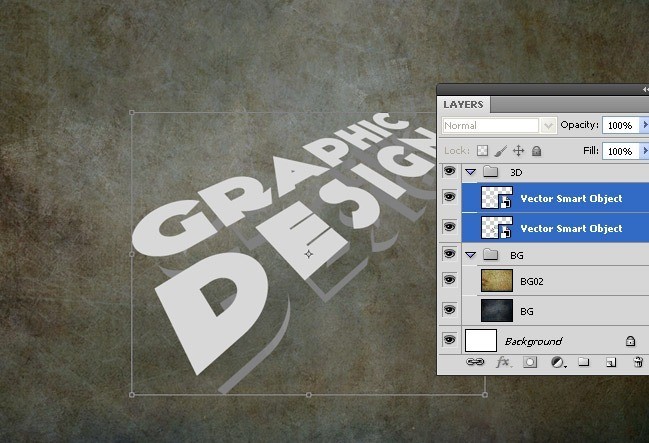
Step 09
Close these two shapes to each other and rename the lighter shape layer to Upper Part and the darker shape layer Below Part.
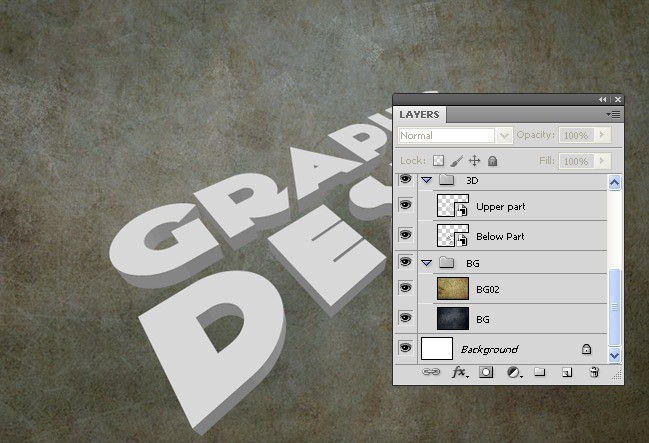
Step 10
Duplicate the BG02 and clear the layer style by setting the Fill Opacity 100% and the blend mode: normal, also decrease the size of about 60%, and move it to above of Upper part? layer then press Ctrl + left click on the Upper part layer to make the selection.
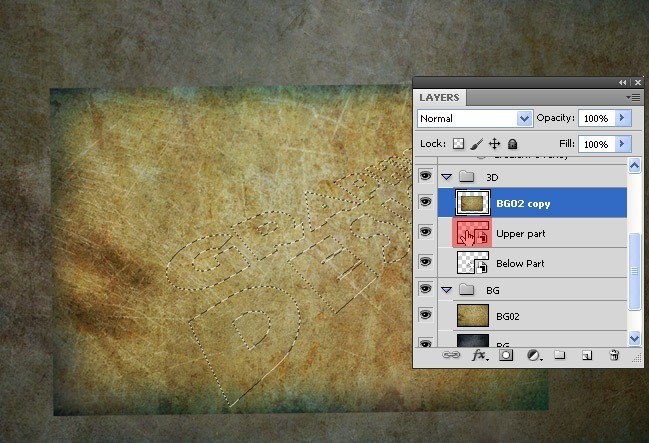
Step 11
Select the BG02 copy and click on the Layer mask?![]() on the layers pallet, also hide the Upper part layer.
on the layers pallet, also hide the Upper part layer.
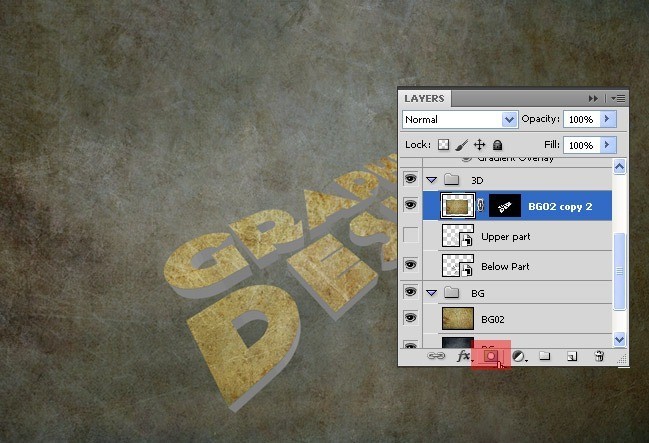
Step 12
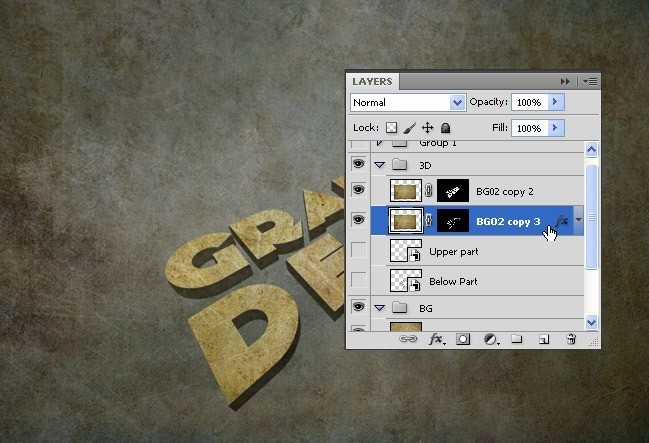
Repeat the previous? step on the Below part layer, but here we need to add some layer styles select the layer BG copy3 and select Layer>> Layer style>> Drop shadow.
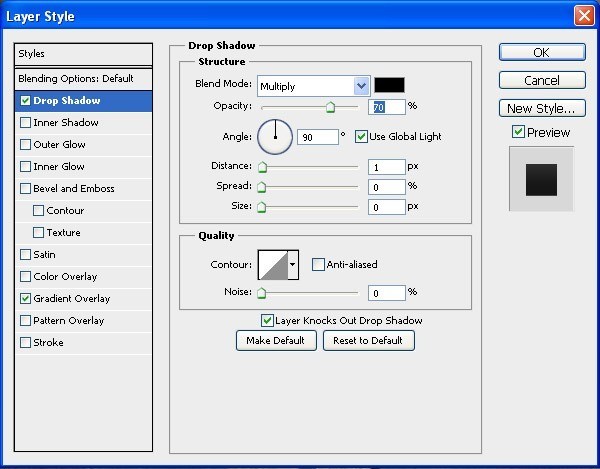
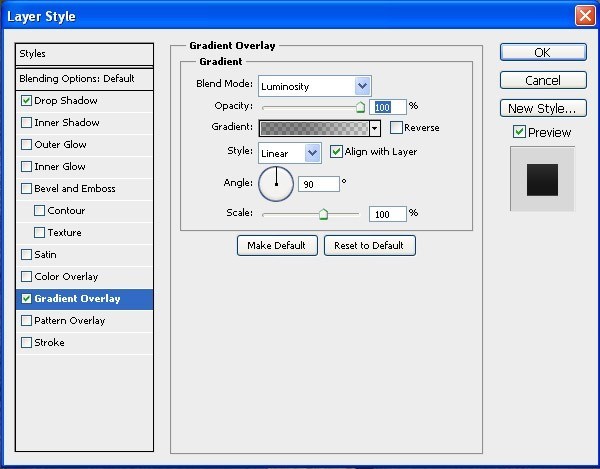
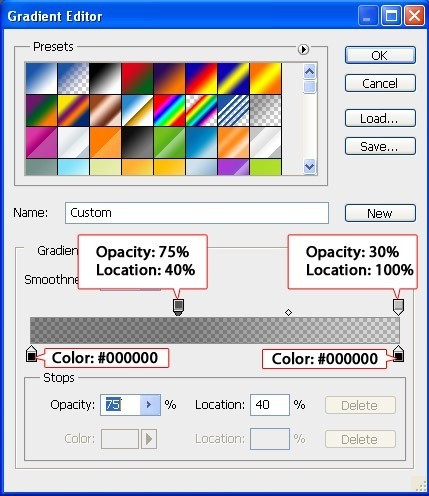
Select the Gradient Overlay set the below settings and click on the gradient ![]() to open the Gradient Editor.
to open the Gradient Editor.
Step 13
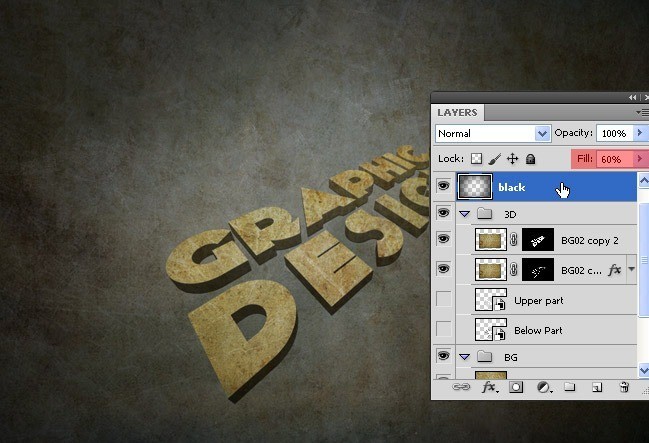
Create a new layer and fill it with black color and the opacity 60%, and select the Erase tool ![]() with size 700px and Opacity 30%, then start to erase from the center of the black layer.
with size 700px and Opacity 30%, then start to erase from the center of the black layer.
Step 14
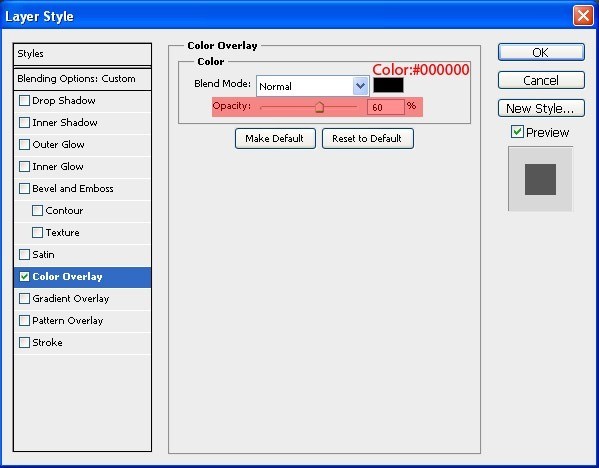
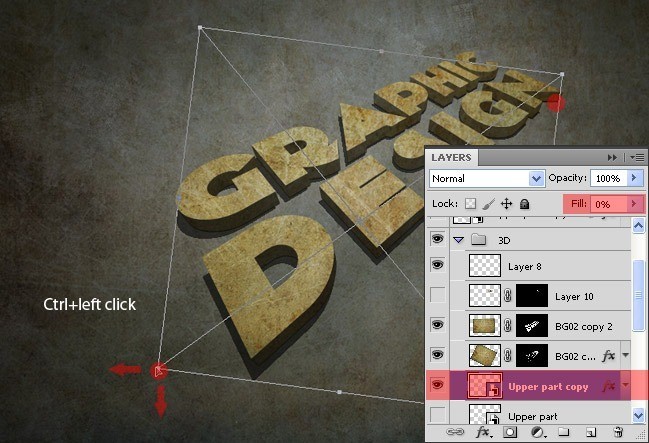
Duplicate the Upper part layer and show it, then make the fill opacity 0% and add color overlay from layer>> layer style>> Color overlay, and set the color Black and the opacity 60%, now keep selecting the duplicated layer and hit Ctrl + T to transform the layer.
Step 15
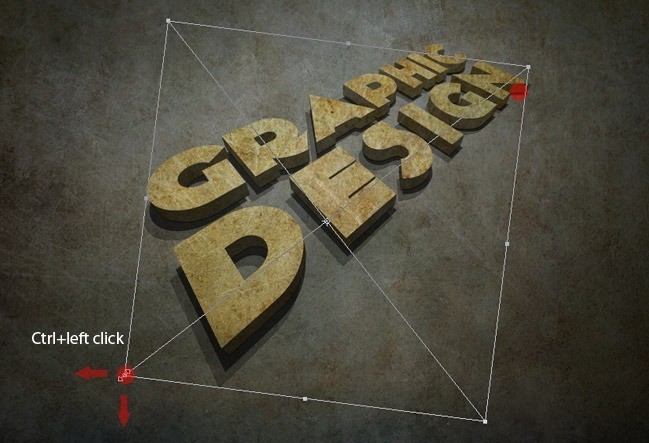
Duplicate the Upper part again and follow the previous step and change the opacity on the color overlay to 30%, and apply the Gaussian Blur and set the radios 2px.
Final
I hope you find this 3D text tutorial useful and help you learn new tips and tricks.


el cazador
November 1, 2010 at 9:20 amSo beautiful ya man
srinivasarao
November 11, 2010 at 1:15 pmeffect is superb
Charles Brown
November 15, 2010 at 11:46 amAmazing design… Celebrity Top Design is there to support.
Best wishes!
white
December 7, 2010 at 1:19 amgood way sir
Amrixor
January 6, 2011 at 2:59 amSo nice idea … keep going in that
moises
January 17, 2011 at 6:49 amWWoowww very good job
it’s excelent i will try in my work, I hope stay the same
Brett Widmann
February 8, 2011 at 7:46 pmThis is an awesome tutorial. Thanks for the info!
mameara
September 13, 2011 at 8:10 amThank you all… 🙂
thulet
February 17, 2012 at 3:04 amThanks so much :-*
sithuhtet
November 5, 2012 at 4:46 pmthanks you!