
Light on dark is the easiest effect to attempt and the hardest to make believable. The trick is not the brush or the flare — it is that light adds, it does not paint.
This walkthrough covers the layer stack, the blend modes and the falloff that make a glow look like it belongs in the scene.
Light effects on dark backgrounds
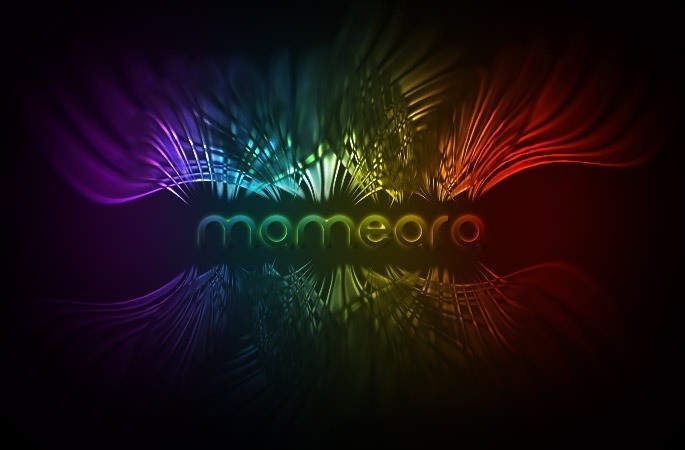
This is my first Adobe Photoshop tutorial just play with blending modes to create Cool light effects on dark background. I used adobe photoshop CS5.
Step01
Lets begin create a file with size 1600px*1000px and set black background “#000000” and type mameara the font used is Oomix

Step02
Create new layer “colors” then select the brush tool with Size:400px and the hardness:0%, choose dark colors for the brush I use this colors: Color 01: #2c0033 – Color 02:#002c33 – Color 03:#313300 – Color 04:#330100

Step03
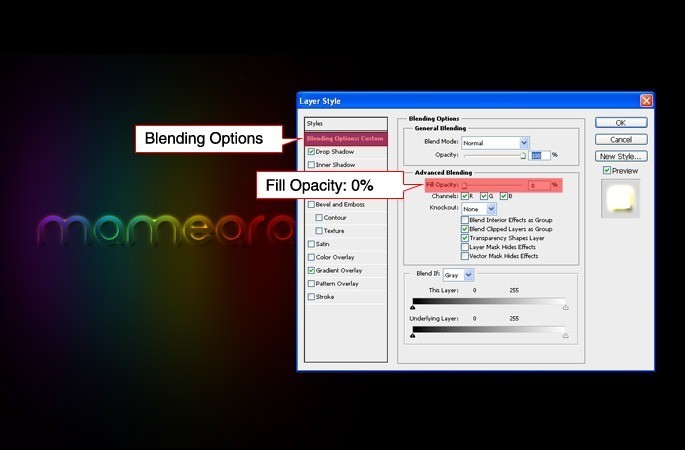
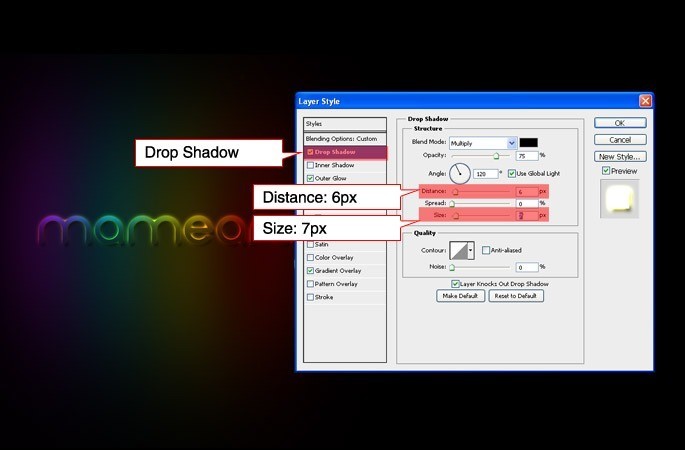
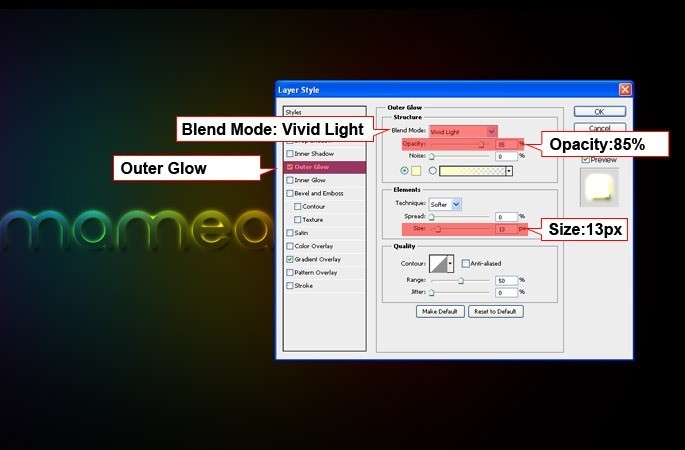
Open the Layer Style of mameara layer and put the properties as showing here:

Step04
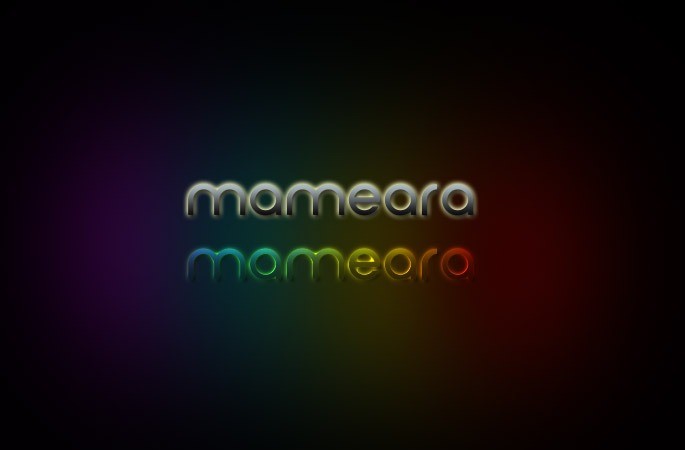
Duplicate mameara Layer and marge it with empty layer.
Step05
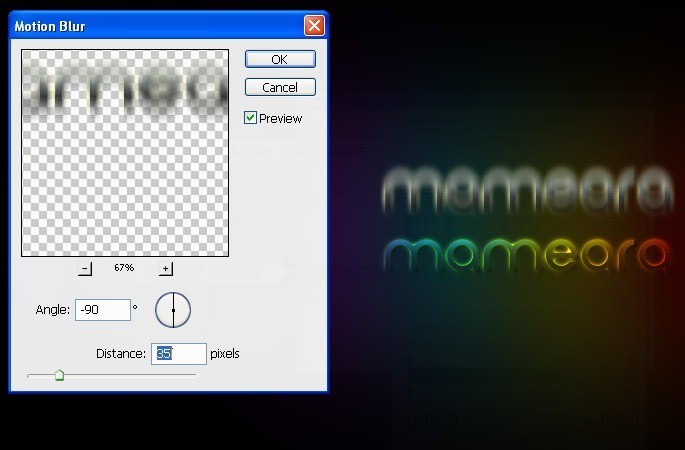
Keep selecting the duplicated layer and select Filter > Blur > Motion Blur.
Step06
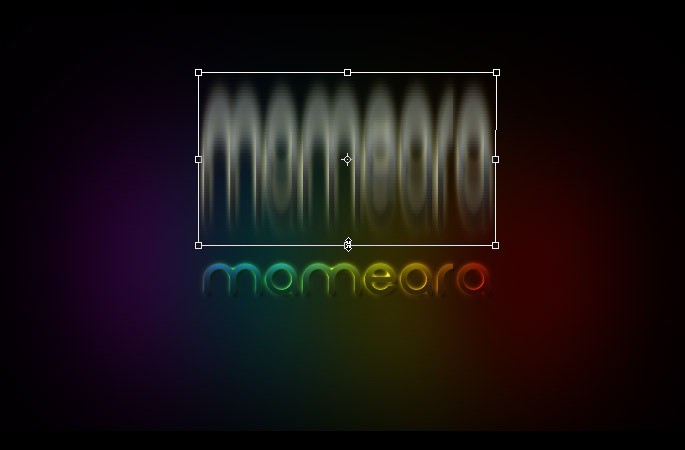
Transform the duplicated layer keep selecting the layer and hit (Ctrl + T) to transform.
Step07
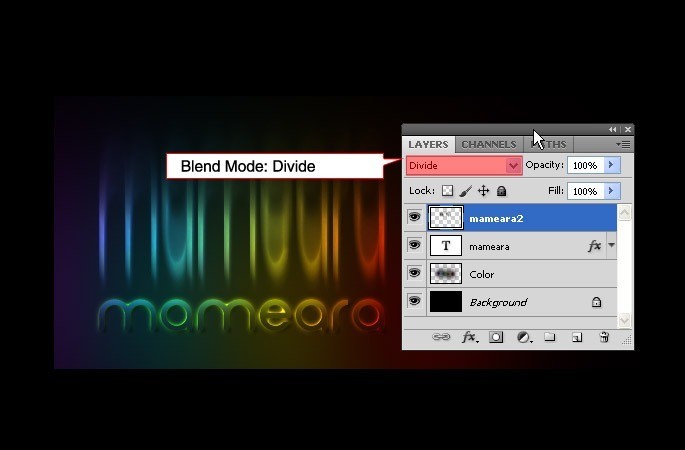
Change the Blend mode to divide
Step08
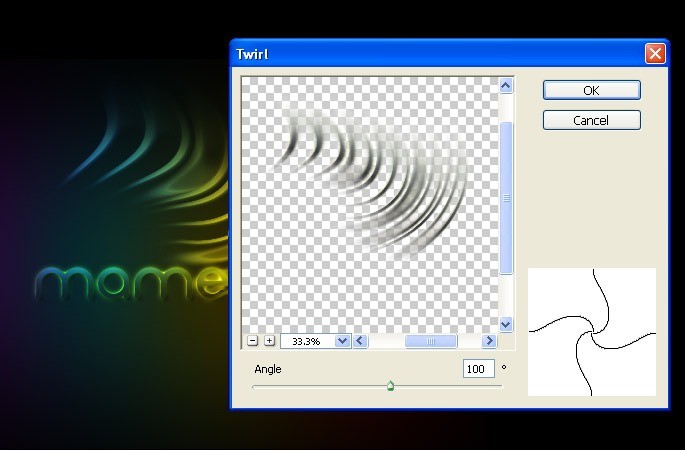
Open Filter > Distort > Twirl , and make the Angle 100�.
Step09
Transform the shape hit (Ctrl+T) then right click select wrap.
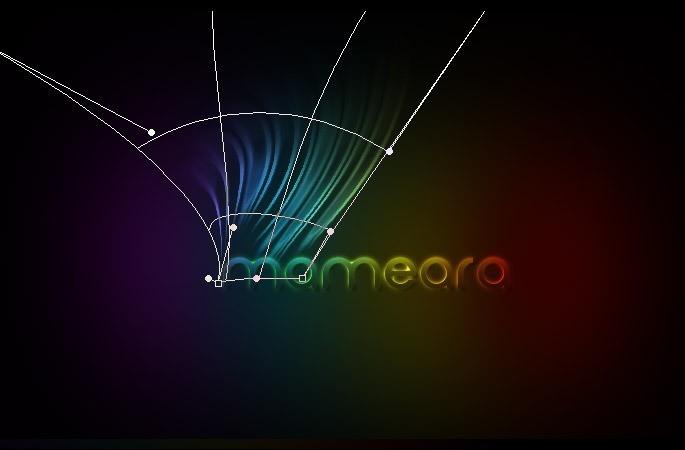
Step10
Duplicate the shape many times.
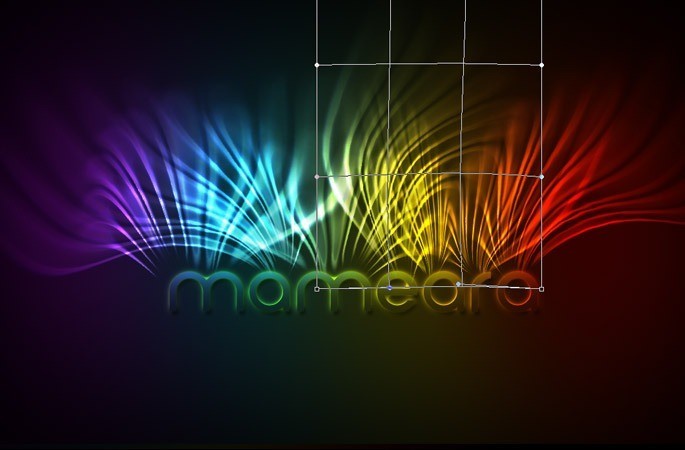
Step11
Marge all the duplicated layers.
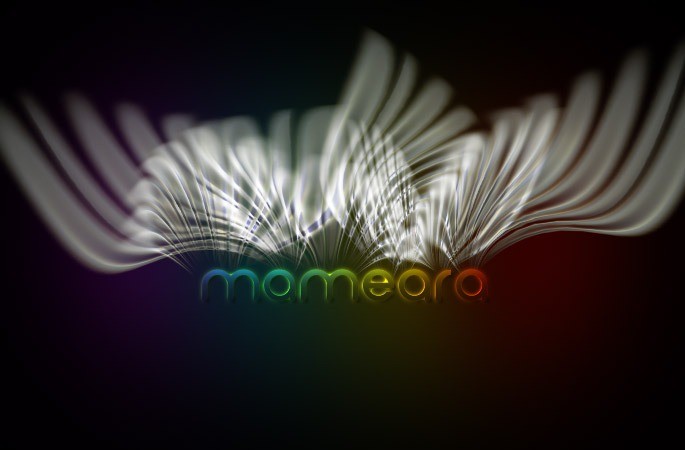
Final
Change the Blend mode to Divide and then duplicated in the same place also duplicate it again and reflect it to the bottom of mameara word.
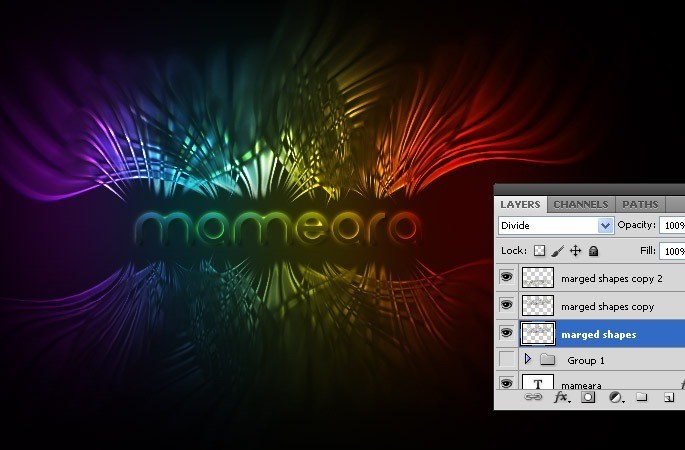
Result
Download the PSD file (7.26 MB)
The stack that works
- Base glow. A soft radial at 15% on Screen — large and faint.
- Core. A smaller, brighter shape at 40%, still Screen.
- Detail. Smoke or particles on top at 10–20% for texture.
- Grade. One colour balance layer over everything to unify the temperature.
Common mistakes
Using Normal blend mode, putting light on a layer below the subject, and making the glow sharp-edged. Light in air always has a falloff — if the edge is visible, the effect is a shape, not light.
More: 10 light and smoke brushes, 180 smoke brushes, and the Photoshop archive.
FAQ
Screen or Linear Dodge?
Screen for a natural glow; Linear Dodge when you need a hot core. Dodge blows out fast, so use it on a separate layer with low fill.
How do I stop banding in a large glow?
Work in 16-bit and add 1–2% noise before exporting.
All designs remain the property of their creators. If you own one and want it removed, contact us.


SEBAST
September 17, 2010 at 12:56 pmAWESOME!! I TRIED THIS AND JUST WOW LOOKS COOOOL…..
Pedro
September 19, 2010 at 6:19 pmIt’s missing the Outter Glow values! plz help
Ali
December 28, 2010 at 1:30 pmHi
Nice Tutorial
AngryBeaver
January 12, 2011 at 9:35 pmDang, Cs3 doesn’t have a divide option. Sadface 🙁
mameara
January 13, 2011 at 7:37 amYes it doesn’t!
Mike
March 6, 2011 at 2:31 pmHi pls i cant make the Twirl step couse when i want tto go Filter>Disort is in grey and i cant use it . Any help pls ?
mameara
March 6, 2011 at 2:42 pmI can’t get what you exactly want to do!
omalisette
January 10, 2012 at 10:32 pmWhat a very good explaned tut, thank you very much
manaserah williams
February 16, 2013 at 6:05 pmit worked… i love it..:)